How do I record a "video" of my SMART Board presentation to include my narration?
The "video" you are making is called a "screencast" or "video screen capture." It is a digital recording of your laptop screen (or SMART Board) and can include your narration. There are many tools for creating screencasts, but the one you have on your laptop is called SMART Recorder.
1. Open SMART Recorder
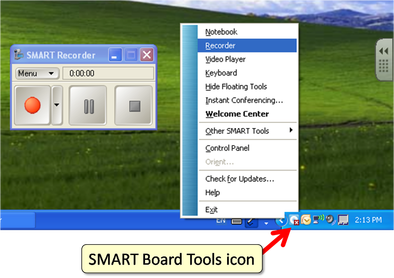
If you have SMART Board Tools running, its icon will display in the lower right-hand corner of your screen. Click on this icon > Recorder
If you don't see this icon, open SMART Board Tools. Go to:Start > All Programs > SMART Technologies > SMART Product drivers > SMART Board Tools
If you have no need for the SMART Board tools, but want to use the SMART Recorder, go to:Start > All Programs > SMART Technologies > SMART Notebook > SMART Recorder

2. Setup audio
|
If you are using your laptop only, the built in microphone will automatically activate when you press the record button.
If you are presenting directly on your SMART Board, which requires you to stand at distance from your laptop, it is best you have an external microphone (either wireless or with a long cord.) |
|
3. Record and Save your presentation
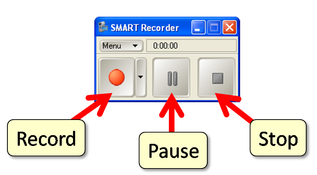
Press the record button and you can start speaking, drawing on and navigating through your presentation. When you are finished presenting, click stop.
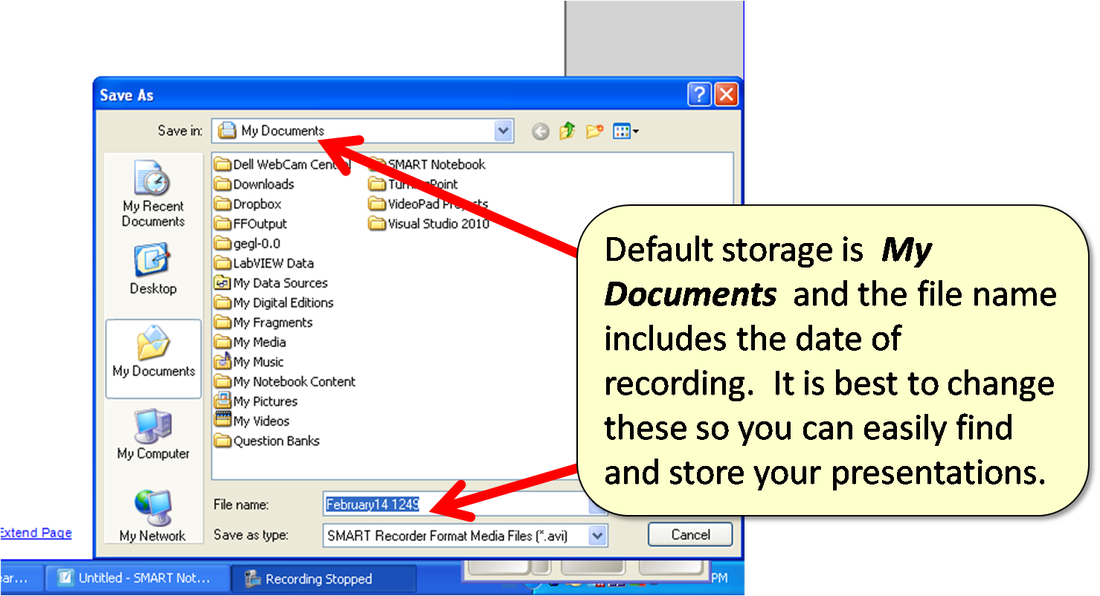
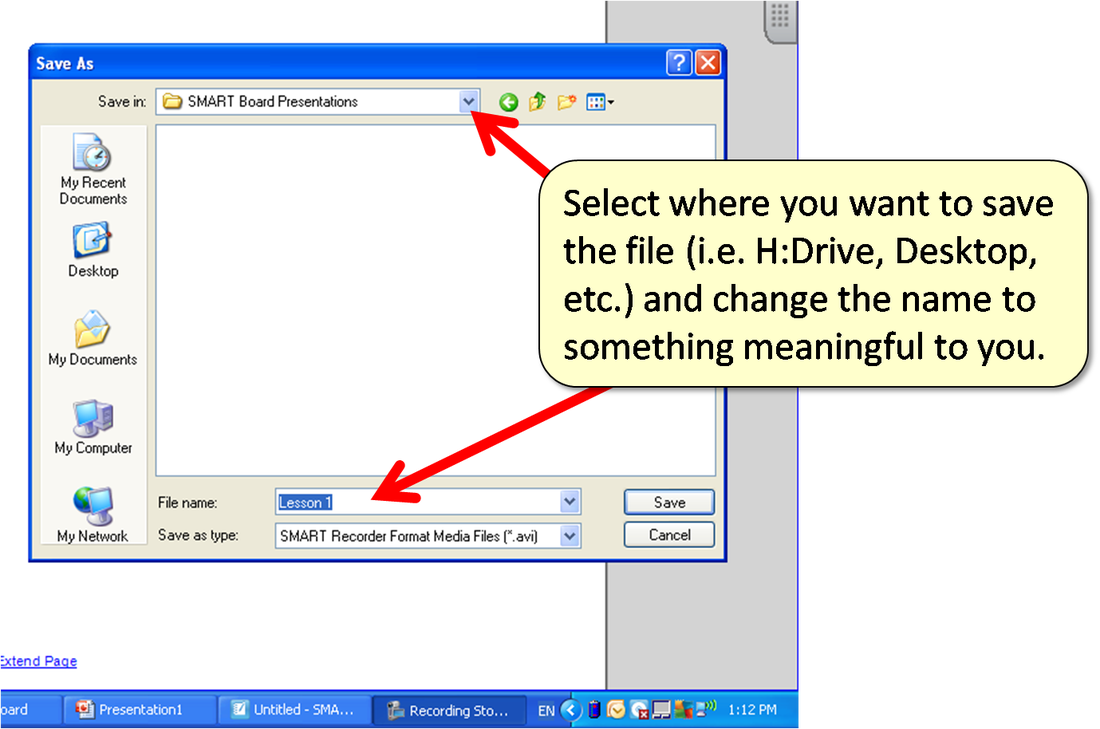
A dialogue box will display asking you to save your presentation. Default is My Documents and your file is given a name with the date of recording. It is best to change these so you can easily find and organize your presentations. Select where you want to save the file (i.e. H:Drive, Desktop, etc.) and change the name to something meaningful to you.
A dialogue box will display asking you to save your presentation. Default is My Documents and your file is given a name with the date of recording. It is best to change these so you can easily find and organize your presentations. Select where you want to save the file (i.e. H:Drive, Desktop, etc.) and change the name to something meaningful to you.